Account-based marketing, or ABM, is a B2B marketing strategy that focuses on specific customers or accounts rather than large groups of segmented prospects. Rather than sending broader campaigns to wider audiences, with ABM, much more focused and personalized campaigns are sent to a smaller group of engaged accounts. We are seeing increasing interest and demand here in Japan to support our clients with focussed programs that reduce waste and more effectively manage named/key accounts.
The goal of a successful ABM strategy is to:
- Identify key accounts
- Engage buyers in the right stage
- Deliver relevant, personalized engagements
- Grow customer relationships
- Build lifetime trust and value
There are three types of ABM marketing programs:
- One-to-one ABM programs target accounts with high revenue potential. You should invest a majority of your time and energy into these accounts, with the end result being more lifetime value from the customer.
- One-to-few ABM programs are a bit broader than the one-to-one programs, but still very targeted. The focus here is on effectively segmenting your accounts with specific criteria, to create a small but targeted group of accounts with similar business goals.
- One-to-many ABM programs identify potentially hundreds of accounts that fall into your target market and also share commonalities across segment, industry, or other relevant criteria.
Now that we’ve covered the basics, here are some hands-on tips for driving ABM ROI with Marketing Cloud Account Engagement (Pardot)
1. Set up Accounts as Campaign Members
In a Pardot instance with connected campaigns and engagement history turned on, every prospect and marketing asset is associated to a Salesforce campaign, which then allows you to create clear and accurate reports in Salesforce.
Salesforce campaigns will be essential in properly segmenting your database and reporting on the results of engagements. However, by default, leads and contacts can be added to campaigns, but Accounts cannot.
Luckily, this feature is easy to enable, and as a starting point, we recommend doing this:
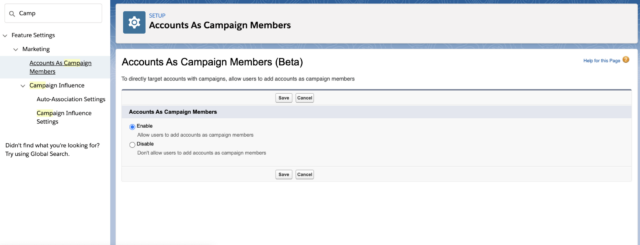
In Sales Cloud, Navigate to Setup > Marketing > Accounts as Campaign Members and hit enable.
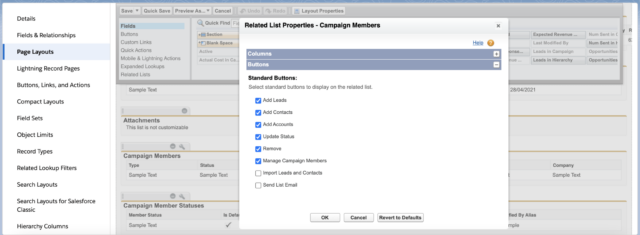
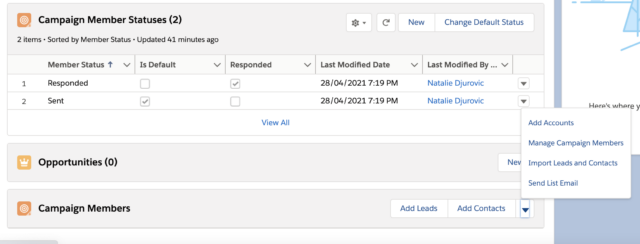
Then edit your Campaign Page Layouts to show the Add Accounts button in the Campaign members related list.
2. Add Engagement History Dashboards
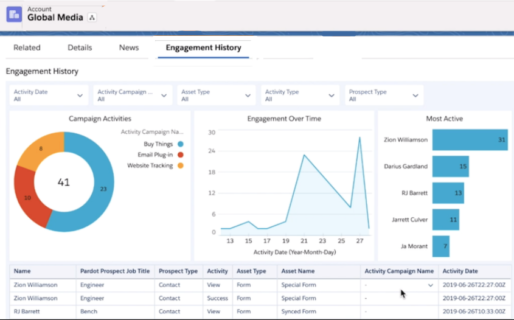
Engagement History Dashboards are out-of-the-box dashboards that show campaign performance over time. They can be added to campaign, account, opportunity, lead, contact and person account page layouts, to group prospects with activity over time, into a single view, on a single page.
Adding Engagement History Dashboards to your account or campaign pages empowers your sales team to get an immediate look into what contacts in the account engaged, what they engaged with, and how they engaged. This also supports opportunity attribution in terms of different roles within the target account against the business decision making process.
To enable this, you must first enable connected campaigns, engagement history and engagement history dashboards, in Sales Cloud and Pardot. Instructions from Salesforce below:
- Enable Engagement History
- Turn On Engagement History Dashboard
- Salesforce Ben Article about all of this here
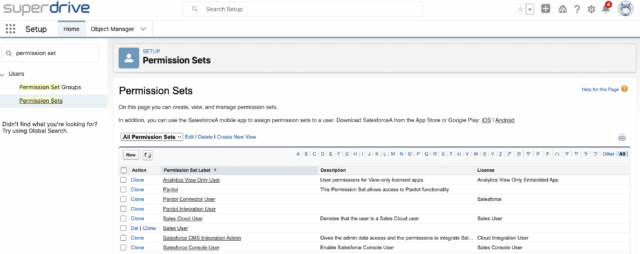
Users who are part of the Pardot, Sales Cloud User and Analytics View Only user permission sets will be able to view the dashboards.
It should look something like this:
Here is what it looks like when complete:
3. Empower sales teams with Salesforce Engage
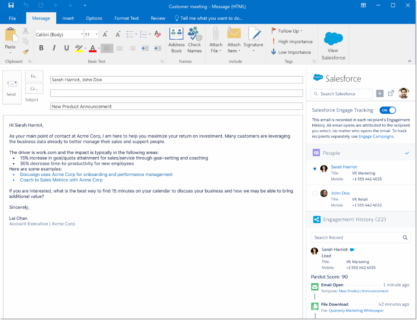
Salesforce Engage is a Salesforce tool that essentially operates somewhere in between Marketing Cloud Account Engagement (Pardot) and Salesforce Sales Cloud. Salesforce Engage can be accessed from within Salesforce, but some features can also be used as add-ons for desktop, outlook and/or Gmail.
Engage empowers sales to:
- Send branded, personalized 1 to 1 emails
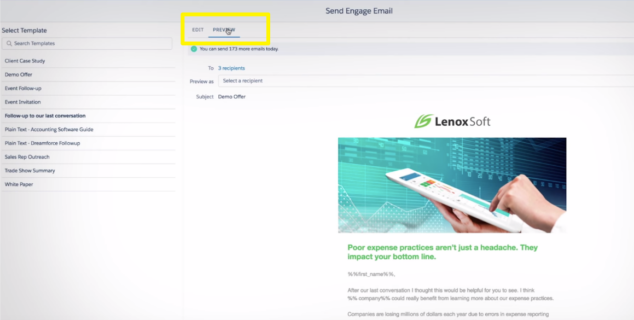
Access email templates created by Marketing in Pardot and easily modify, send and track those templates as one to one emails to their key accounts. Alternatively, sales can create their own emails in Engage.

- Track and report on 1 to 1 email engagement
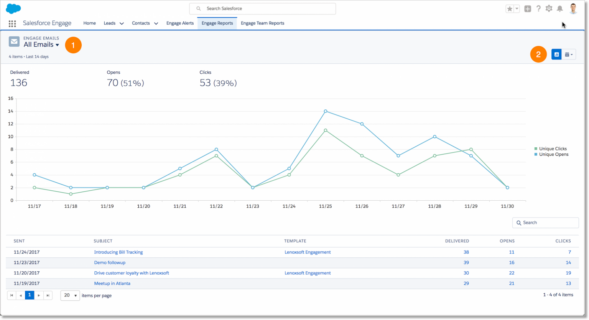
Track opens, clicks of Engage emails and monitor which key contacts did the opening and clicking
- Set up custom alerts and reports for key contact activity
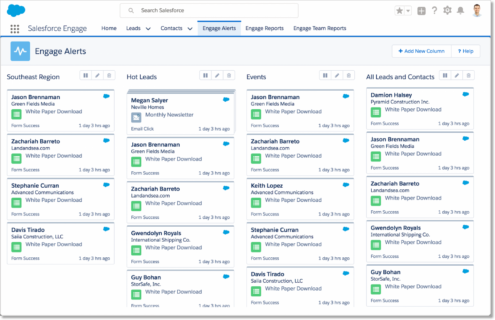
Set up custom alerts and reports for real-time insight into key account activity. For example, if a relevant contact clicked an email or filled out a form, the sales rep can get an instant notification.
Engage is essentially a mini ABM marketing tool for sales and marketing, available from right within Sales Cloud, at additional cost.
See Salesforce Engage documentation here or check out the Salesforceben overview here.
4. Segment key accounts easily with Dynamic lists
Dynamic lists allow you to set some rules and segment your database in real-time. Rather than continuously adding key accounts to a list for engagement, dynamic lists have set rules which refresh and bring new prospects into the list every 10 minutes or so, if they match the criteria. Set it and forget it!
Dynamic lists are perfect for ABM, as you can set a specific set of criteria and then leave it to the list to continually keep pumping new contacts which meet the criteria, into your customer journeys.
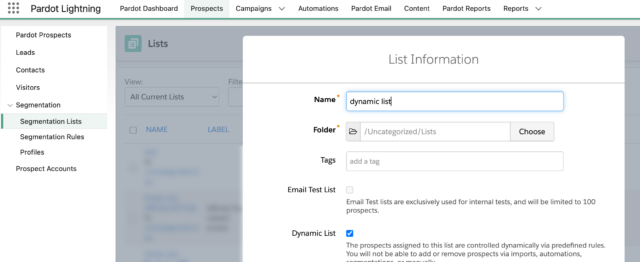
To create a dynamic list, in the Pardot lightning app, navigate to Prospects > Segmentation Lists and create a new list. Check off the “dynamic list” checkbox.
Set some rules for your dynamic list. Here is a simplified example of a dynamic list targeting prospects from specific customer accounts:
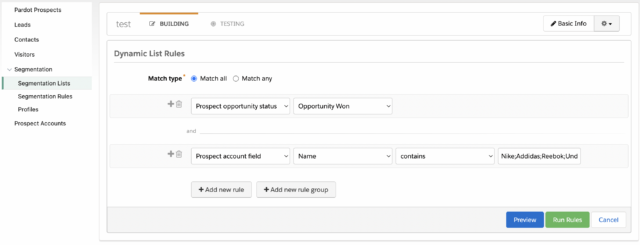
- Use Account name contains and semicolons for easy “Match Any”, (OR) logic
- Use “opportunity status won” to target only prospects related to won opportunities (ie actual customers)
- Use “Match All” AND logic to combine #1 and #2
- Set the list as an entry list for your ABM email journey
5. Dynamic content to hyper-personalize your content
With dynamic content, you can display different messages to prospects in emails, landing pages and forms, based on what we know about them. If you have the second tier plan from Pardot, you have access to dynamic content and it looks something like this:
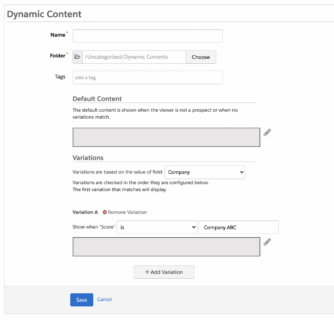
As you can see, it is quite simple, you specify some rules and variations based on a prospect fields and control what the prospect sees, based on the values they have for those fields.
Here is a simplified example of how this can be used for ABM:
- Variations are based on the value of field “Company” (ie Account name)
- Variation A: Company is Nike. Content is tailored to Nike.
- Variation B: Company is Adidas. Content is tailored to Adidas.
etc. - You can add up to 25 variations
- Generate a code snippet and place the snippet on your emails, forms and landing pages
To get in touch with our team of experts, please drop us a line in the form.
Written by Alon Margovskiy, Head of Marketing Automation, Superdrive.
Superdrive is an official Salesforce Partner with Salesforce Certified Marketing Cloud Specialists and Consultants.
