Email templates are reusable email designs that you can base new emails you create on. The idea is, you copy a template, edit the text and images and send your Salesforce Marketing Cloud Account Engagement (Pardot) emails.
However, unfortunately, the prebuilt email templates that come with Pardot are not customized to suit your brand guidelines, are not flexible and are not responsive (which basically means your emails will not show up great on mobile phones).
Superdrive to the rescue.
As part of a Superdrive Salesforce Marketing Cloud Account Engagement (Pardot) implementation, you will get a shiny new Pardot email template tailored to your brand. Use this guide to learn how to edit, copy, test and send it to your prospects.
If you don’t have a Superdrive template, feel free to reach out. Or, if you just want to learn about Pardot basics, this guide should apply regardless, so feel free to read on.
Create Emails in Pardot
There are two types of emails in pardot – “list emails” and “email templates”.
You will use “list emails” when you want to create a one-time email, send it to a list one time and be done with it. Nothing automated about it. A good example is a monthly newsletter you create and send every month, manually.
Here’s how to create a list email in Pardot
To create a new list email based on your shiny new responsive template, login to pi.pardot.com and from the Marketing menu choose Emails>List Emails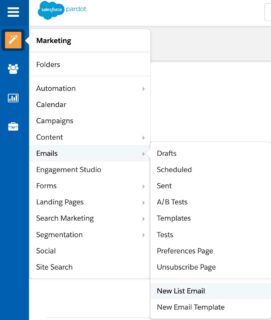 Fill in the required fields
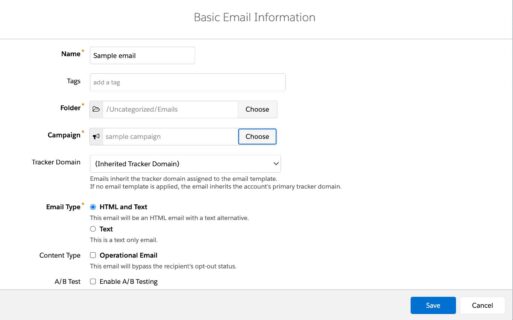 select the template to base the design off
 And you’ve now got yourself a new list email that you can edit and send to your list.
Here’s how to create an email template in Pardot
The other type of email in Pardot other than list emails, is confusingly called “Email templates”. Email templates can be used for automated sorts of email campaigns, such as drip campaigns or auto trigger “thanks for your submission” emails that are sent out after someone submits a form, for example.
To create a new email template to use in an automated email, you will simply make a copy of your responsive email template, edit that and send away. Login to pi.pardot.com and from the Marketing menu choose Emails>Templates.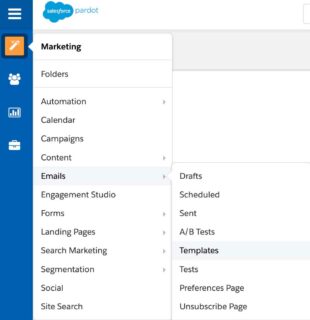 Navigate to the template called “Responsive Email Template” and click copy to make a copy.
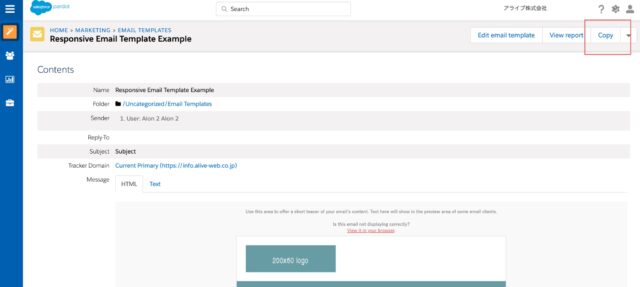 Fill in the required fields
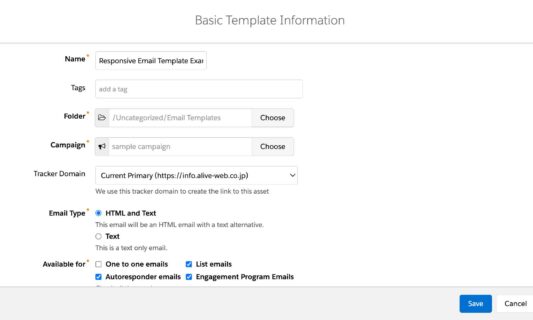 hit save and now you’ve got a new email template that you can edit and use in your marketing.
Editing an email in Pardot
Now that you’ve created your email, let’s go over how to modify it to use your text, images and whatnot.
Editable blocks in Pardot
Pardot emails are comprised of editable blocks, which are bits of content that you could duplicate, rearrange or delete to your liking. For example, a “text block” is a box with some text. An “image block” is a box with an image. A “2 column block” is a box with image on the right text on the left. You get the idea…
Editing the contents of a block in Pardot
- Text blocks
To edit some text in a text block, click on the block you want to edit. Use the wysiwyg editor and editor window on the right side to edit your content. It is simple and similar to Microsoft word and other tools, in that you can change text colours, make text bold, add a link etc. For a full breakdown of the icons in the editor and everything you can do, check out this help article from salesforce.
- Image blocks
To swap out an image for your own, in an image block, click the image block you want to edit. The editor will pop up on the right side. Double click the image there, to edit the image.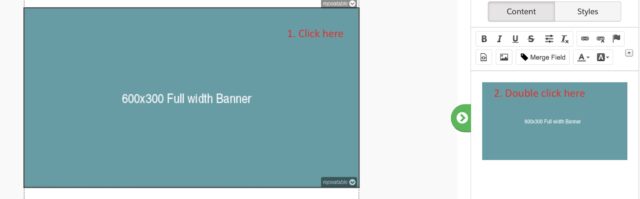 Click the upload tab and upload a file from your computer (Note: be sure to resize your image before uploading to the recommended dimensions below for best results on outlook)
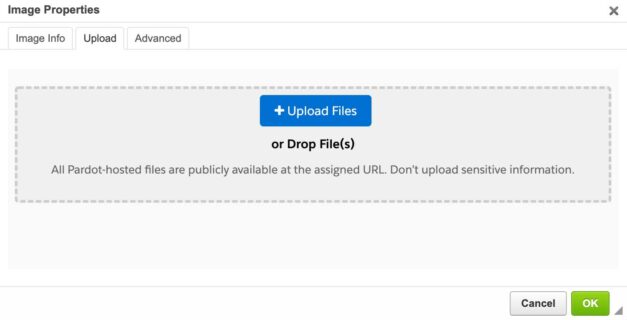 You will see a preview in the “Image info” tab. One last important step is to delete the numbers in the width and height areas. This will ensure optimal rendering for mobile.
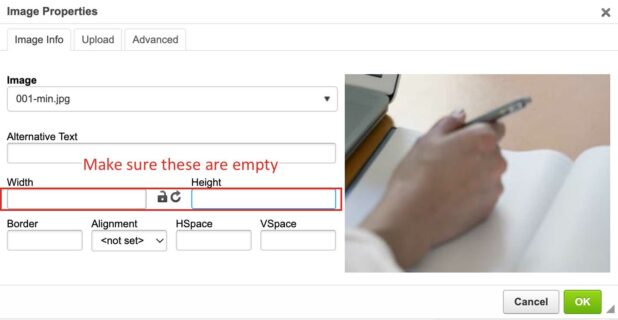 Size recommendations for optimal image rendering:
I recommend resizing your image before uploading to pardot with the following dimensions:
1. Full width banner: width 600px, height anything is ok
2. Full width banner with side padding: width 560px, height anything is ok
3. 249 square: 249px by 249px
4. 199 square: 199px by 199px
5. Logo: Anything is ok, up to a max of 600px. Recommendation is 200px wide
- Button Blocks
Unlike all other elements, buttons are a bit fussy when it comes to Outlook. So, to edit these and have them render perfectly across all clients including outlook and mobile, we will need to tweak the HTML for the button. But don’t worry, it is simple!
First, click the button block and in the editor that pops up on the right side, click the HTML icon (<>)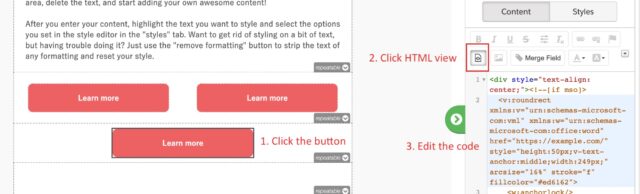 We will need to edit the code
The code will look like below and the highlighted bits are what you will need to edit:
<div style="text-align: center;"><!--[if mso]>
<v:roundrect xmlns:v="urn:schemas-microsoft-com:vml" xmlns:w="urn:schemas-microsoft-com:office:word" href="https://example.com/" style="height:50px;v-text-anchor:middle;width:249px;" arcsize="16%" stroke="f" fillcolor="#ed6162">
<w:anchorlock/>
<center>
<![endif]--><a href="https://example.com/" style="background-color:#ed6162;border-radius:8px;color:#ffffff;display:inline-block;font-size:13px;font-weight:bold;line-height:50px;text-align:center;text-decoration:none;width:249px;-webkit-text-size-adjust:none;">Learn more</a> <!--[if mso]>
</center>
</v:roundrect>
<![endif]--></div>
Highlighted in red:
This is the url that button links to. Switch this out to whatever URL you want it to link to. Note that you should switch this in two places
Highlighted in green:
This is the button’s call to action text. If you want it to say something other than “Learn more”, enter it here. Make sure it is short and sweet or it may look strange in some clients.
Deleting, Adding and Rearranging Editable Blocks in Pardot
In the top right of every block, there is a little bit of text that reads “repeatable”.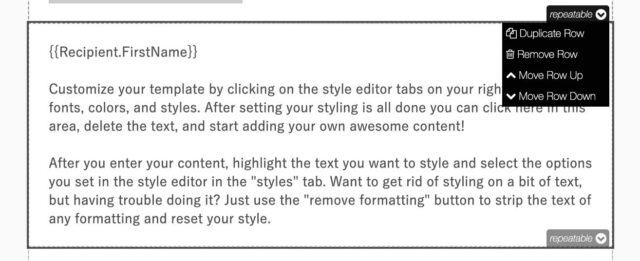 Hover over that and you will get a menu consisting of the following:
- Duplicate row
Clone a block. For example, let’s say you have an image block but you would like to add another image block somewhere else in your email. Select duplicate and BAM! – now you have two image blocks!
Before: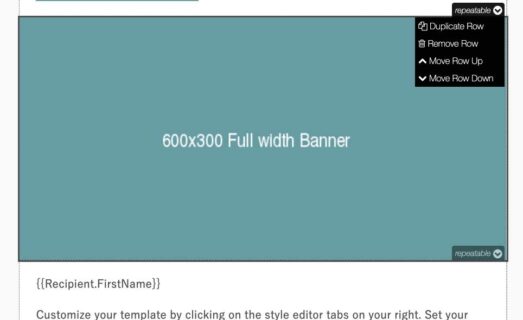 After:
- Remove Row
Delete a block entirely. For example, let’s say you do not need a button. Delete that block and it is gone baby gone.
Before: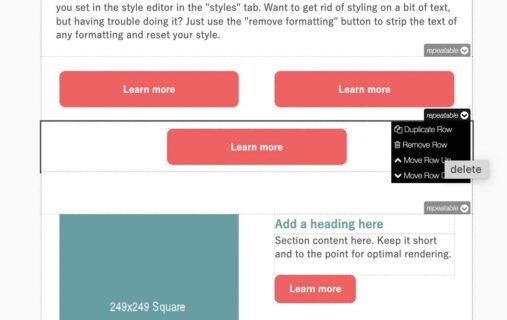 After:
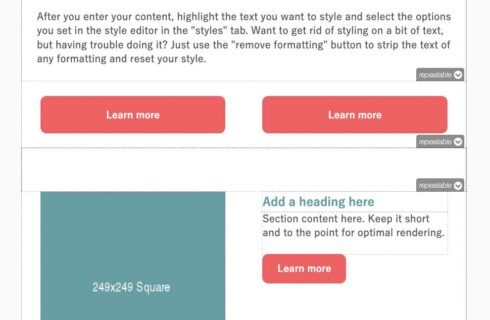
- Move Row Up/Move Row Down
Use this to change the position of where a block is located. For example, let’s say your image block is currently above your text block but you want it the other way around. Simply move the image block down and you’re all set.
Before: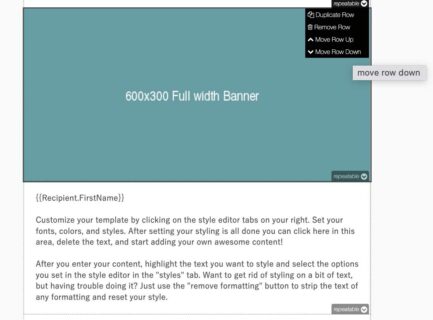 After:
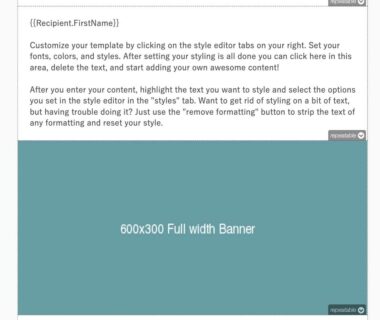 Edit your email’s subject line
The subject line can be edited in the “Sending tab” or in the “Editor” tab of an email.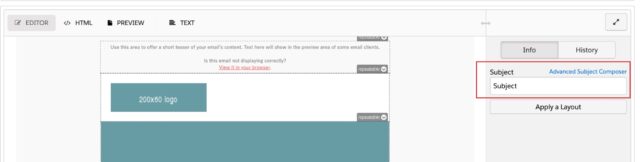 The subject line will determine wether your email gets opened or not, so make it short, sweet and accurate. Remember that if this is too long, most email clients will cut it off. Try to stick to 41 characters or less if it is at all possible.
Edit your email’s preview text
“Preview text is the bit of text below or next to an email’s subject line in the inbox and gives extra insight into what’s inside the email. Gmail refers to this as Snippets, Apple Mail refers to it as a preview, and Outlook calls it a Message Preview. No matter what it’s called, this copy is the preview text.” (https://www.litmus.com/blog/the-ultimate-guide-to-preview-text-support/)
Keep this to 90 characters or less for best results.
To edit your preview text, simply click the very top text block of your email and change the wording. Update the text version of your email
If someone’s system or client does not allow HTML emails, they will receive only a text version of your email, with images, links and fancy shmancy designs stripped out. You control what that looks like by going to the “Text” tab of your email and modifying the content.
Since this case is so rare and unimportant in most cases, and also becuase it is so easy to forget to set this, I usually keep it as is for all emails, with content like this:
Hi {{Recipient.FirstName}}
This email uses images and did not display correctly on your device. To view the full email in your web browser, please follow the link below:
{{View_Online}}
This way, instead of a text version of the email they click a link and are able to open the HTML version in their browser. This way you can ensure everyone sees the email in its best form and you can ensure you do not need to remember to add a text version of your email each time.
Anyway, if you do want to update the text version of your email you can do so by clicking the text tab.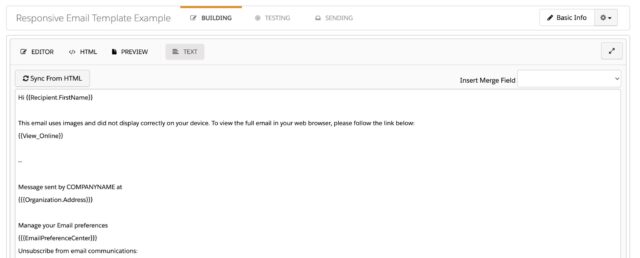
Testing a Pardot Email
Once you’re done with your email you will want to test it. Navigate to the Testing tab to do some testing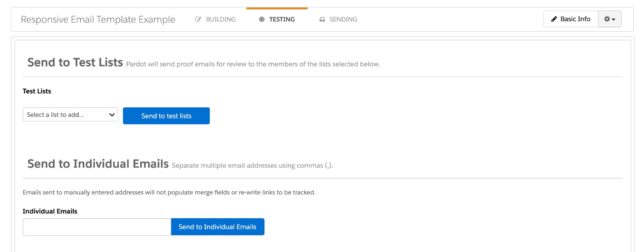 There are two ways to do a test. Sending to a test list is my recommendation. It will ensure all variable tags are rendered properly and you only get the HTML version of your email.
- Send to Test Lists
Simply choose a test list from the dropdown and Hit “Send to test lists”. You should receive the email within a few seconds.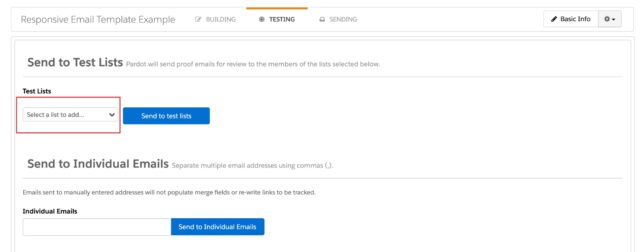 Don’t have a test list? You can create one
Creating a test list
In pi.pardot.com navigate to the marketing menu>segmentation>lists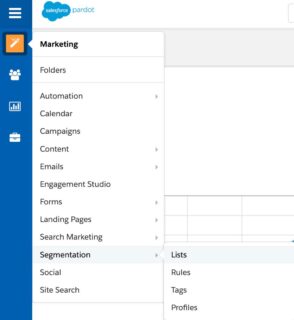 Click Add list, give your list a name and make sure you check off the “test list” checkbox
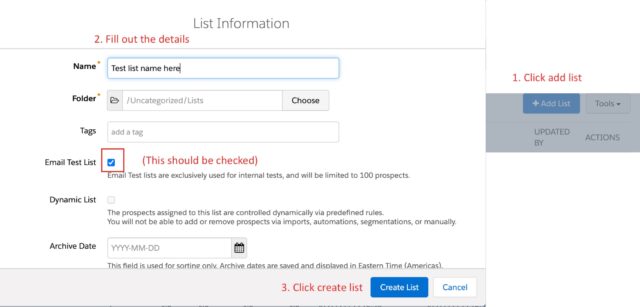 Next, we will create a test prospect and add them to the list.
In pi.pardot.com go to the prospect menu > Prospect list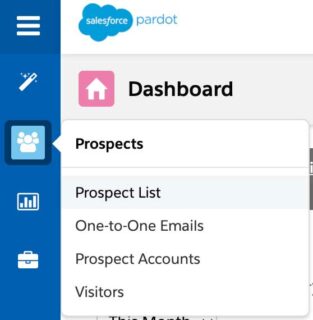 Create yourself as a test prospect
 The prospect details are not that important, other than making sure you enter the test email you want to use for testing, in the email address field.
Once you’ve created yourself as a prospect, open the prospect up, go to the “Lists” tab and add yourself to the test list you created by searching for it. Click “Save lists”.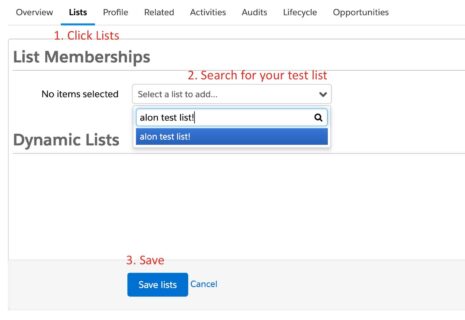
- Send to Individual Emails
If you do not want to create a test list, you can test your email by manually entering email addresses to send to separated by commas in the bottom portion that reads “Send to Individual Emails”. This takes a bit more time each time and variable tags will not render. However you will receive a test of both the HTML and text versions of the email by doing it this way, if that matters for you.
Send a Pardot List Email
Once you’ve made your email you can click the Sending tab to double check the subject line, add a list to send to (or a suppression list to exclude), and either send the email right away or schedule the email to go out at a future date. Click Send now to send now, or Schedule to choose a date and time to send it.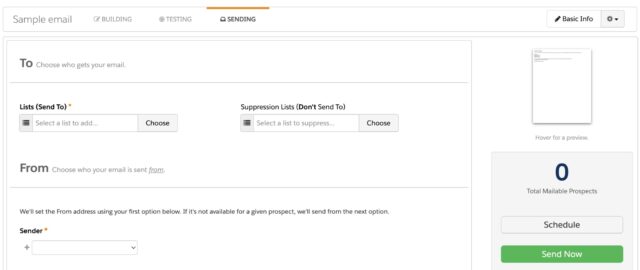 Note regarding the “Sender”. This is the “FROM” field in the email that the prospect sees when they receive the email. You can choose who to send the email from:
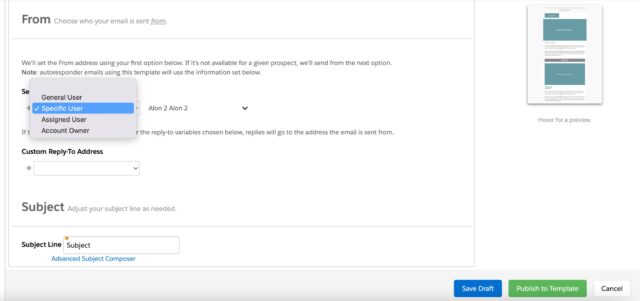 1. A General user – you just enter the name and email address, the simplest and recommended way
2. Specific User – a pardot user. This is fine too
3. Assigned User – Email will come from the person who owns the lead or contact in salesforce
4. Account owner – Email will come from the person who owns the account related to the contact in salesforce
Note: if you choose 3 or 4, you need to choose a general user or specific user as a backup. For example if you want to send from the account owner, what if they are not associated to an account? In that case you need to send a general user or a specific user as a backup. You can do this by clicking the + symbol again and setting a backup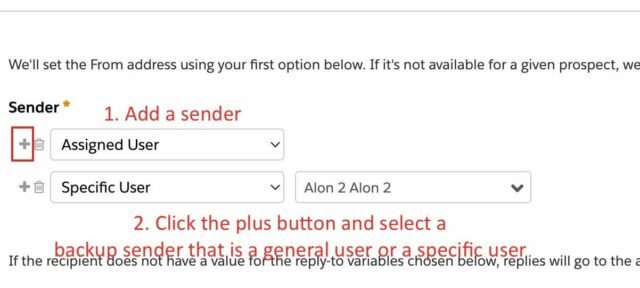 …and that’s it. You’ve just created, tested and sent a Pardot email!
To get in touch with our team of experts, please drop us a line in the form.
Written by Alon Margovskiy, Head of Marketing Automation, Superdrive.
Superdrive is an official Salesforce Partner with Salesforce Certified Marketing Cloud Specialists and Consultants.